Houseplants are a great way to bring nature inside, but some apartment-dwellers may find it difficult to find the perfect plants for their space. Since some apartments have minimal natural light and square footage, it’s important to know which plants are resilient enough to survive in that environment.
I asked this question on our Instagram page & I was surprised to hear that there are people who really don’t like caterpillars or butterflies. If you are one of them, then you may want to skip over this blog post.
My family really loves butterflies. We sort of stumbled into caterpillar rearing last summer. A friend of mine asked if I wanted a swallowtail caterpillar to watch eat our dill. No sooner had she asked, that I realized we had a few on our dill already! If you plant dill, make sure you inspect before consuming. You might have some little eggs or baby caterpillars on it!
Today, as I am getting ready to start milkweed seeds, I am reminiscing all of our little monarch caterpillar friends from last summer.
This is a quick montage of some of the videos and pictures from our monarch adventures of 2020
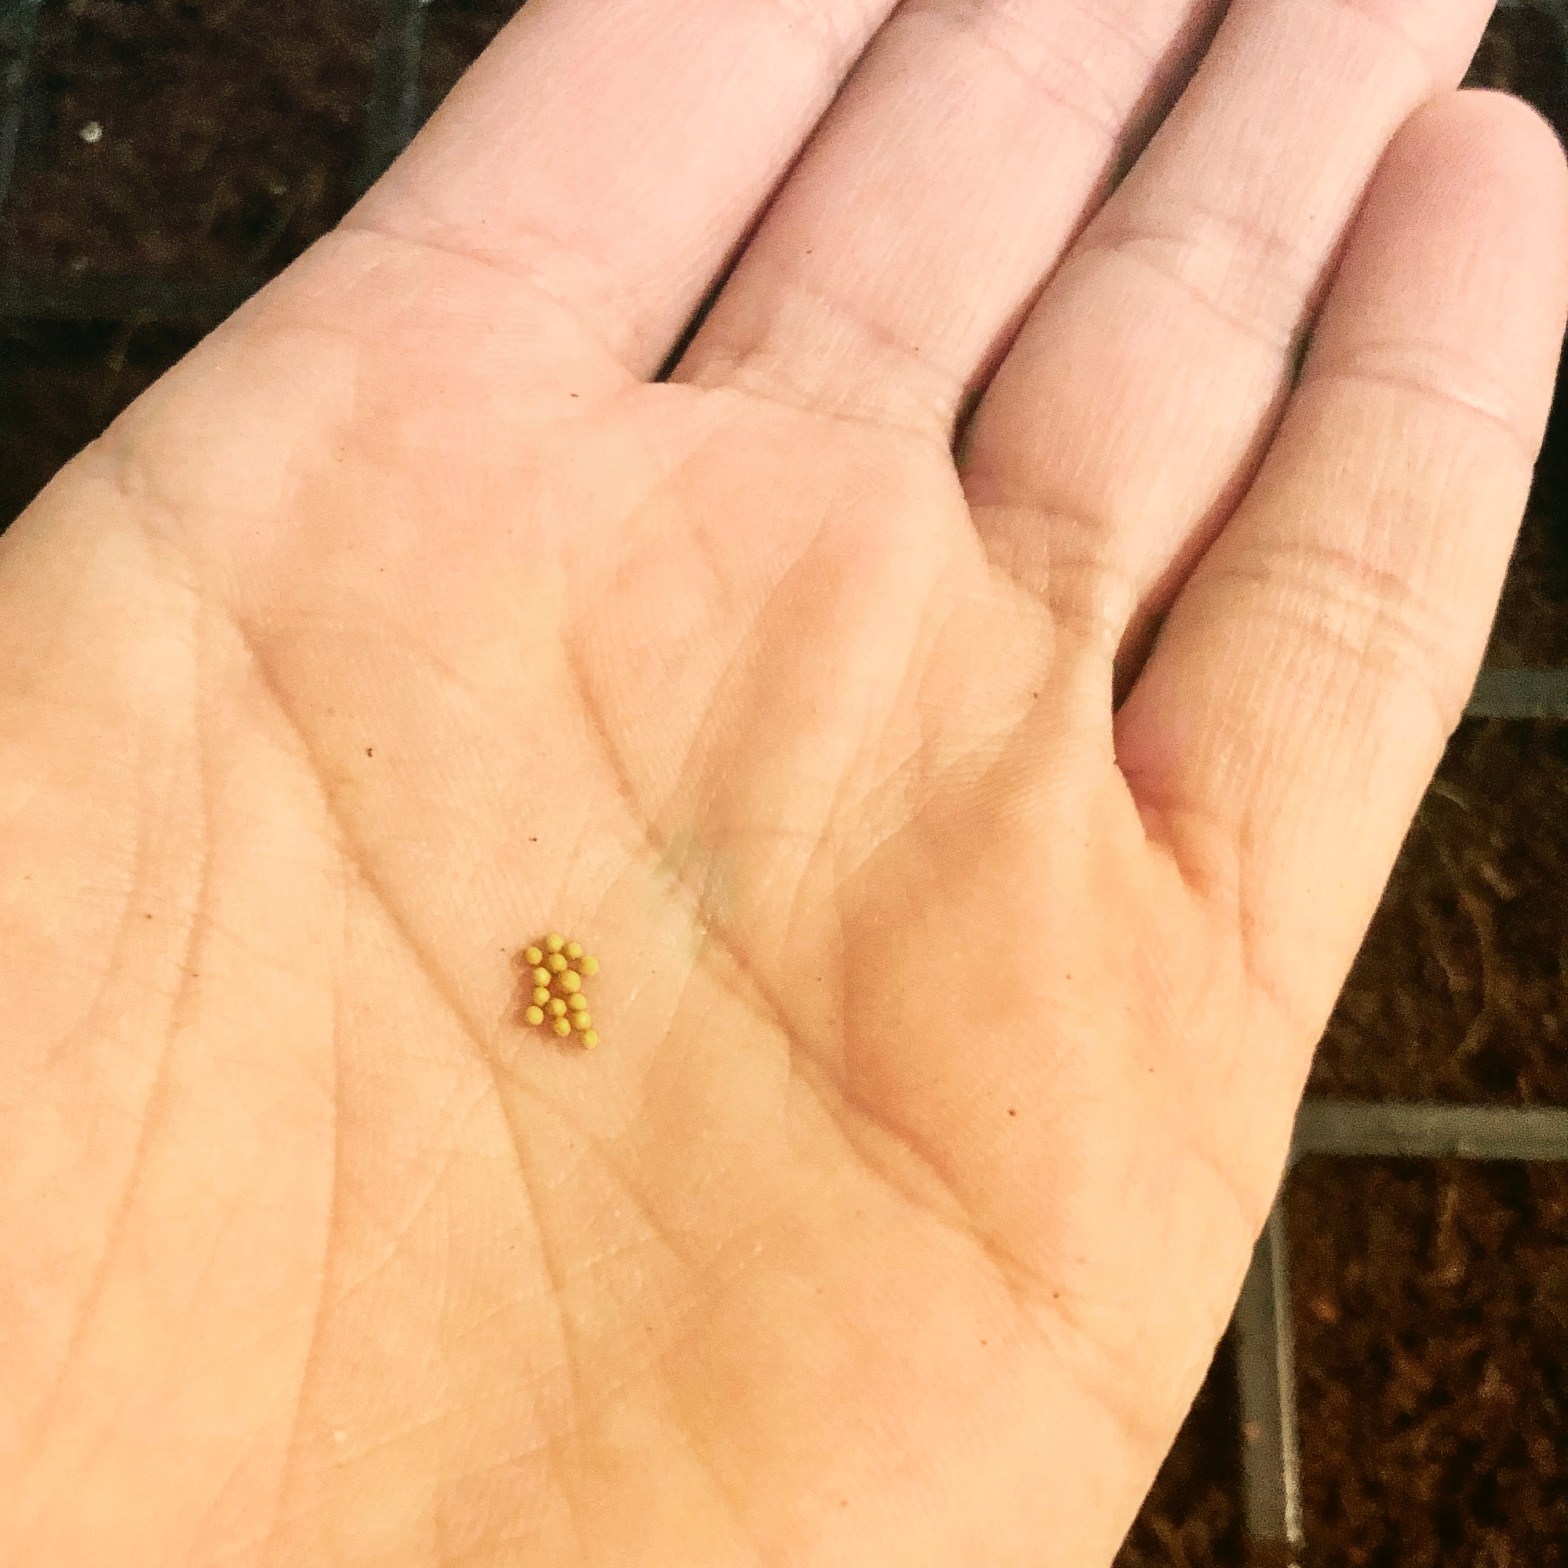
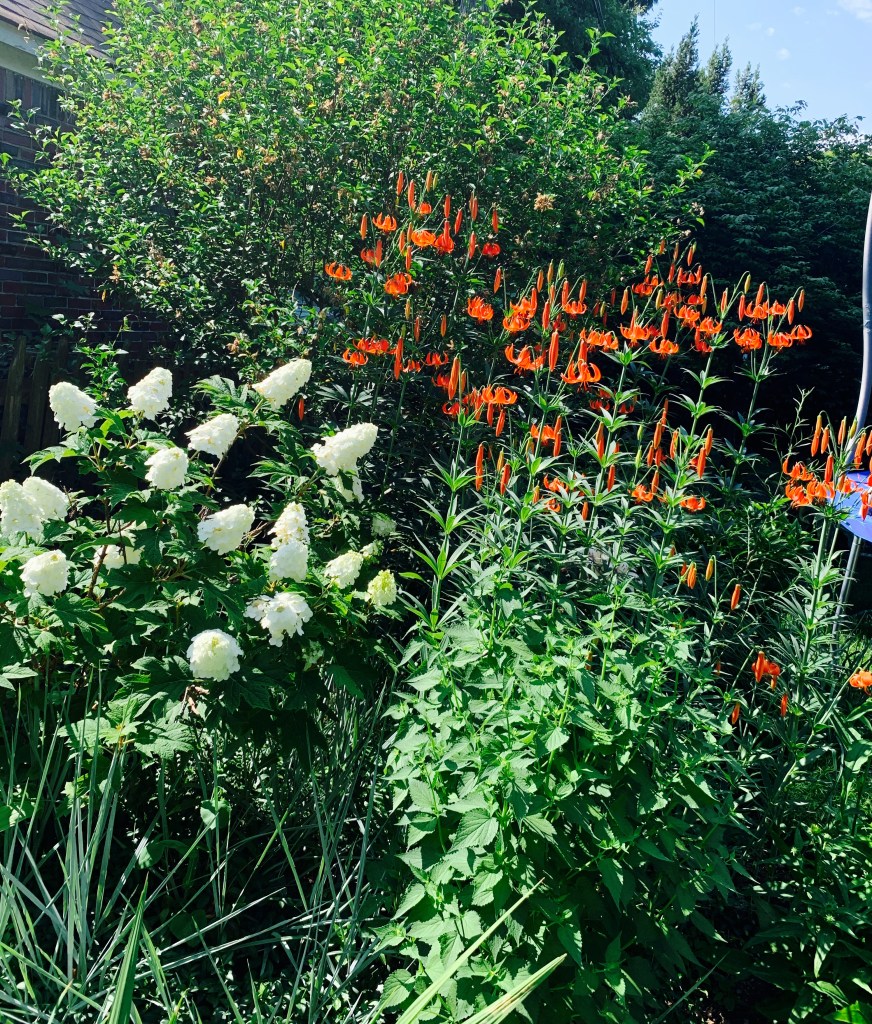
Did you know that milkweed is the sole food source for monarch caterpillars? Planting milkweed on your property can help monarchs and other beneficial insects.
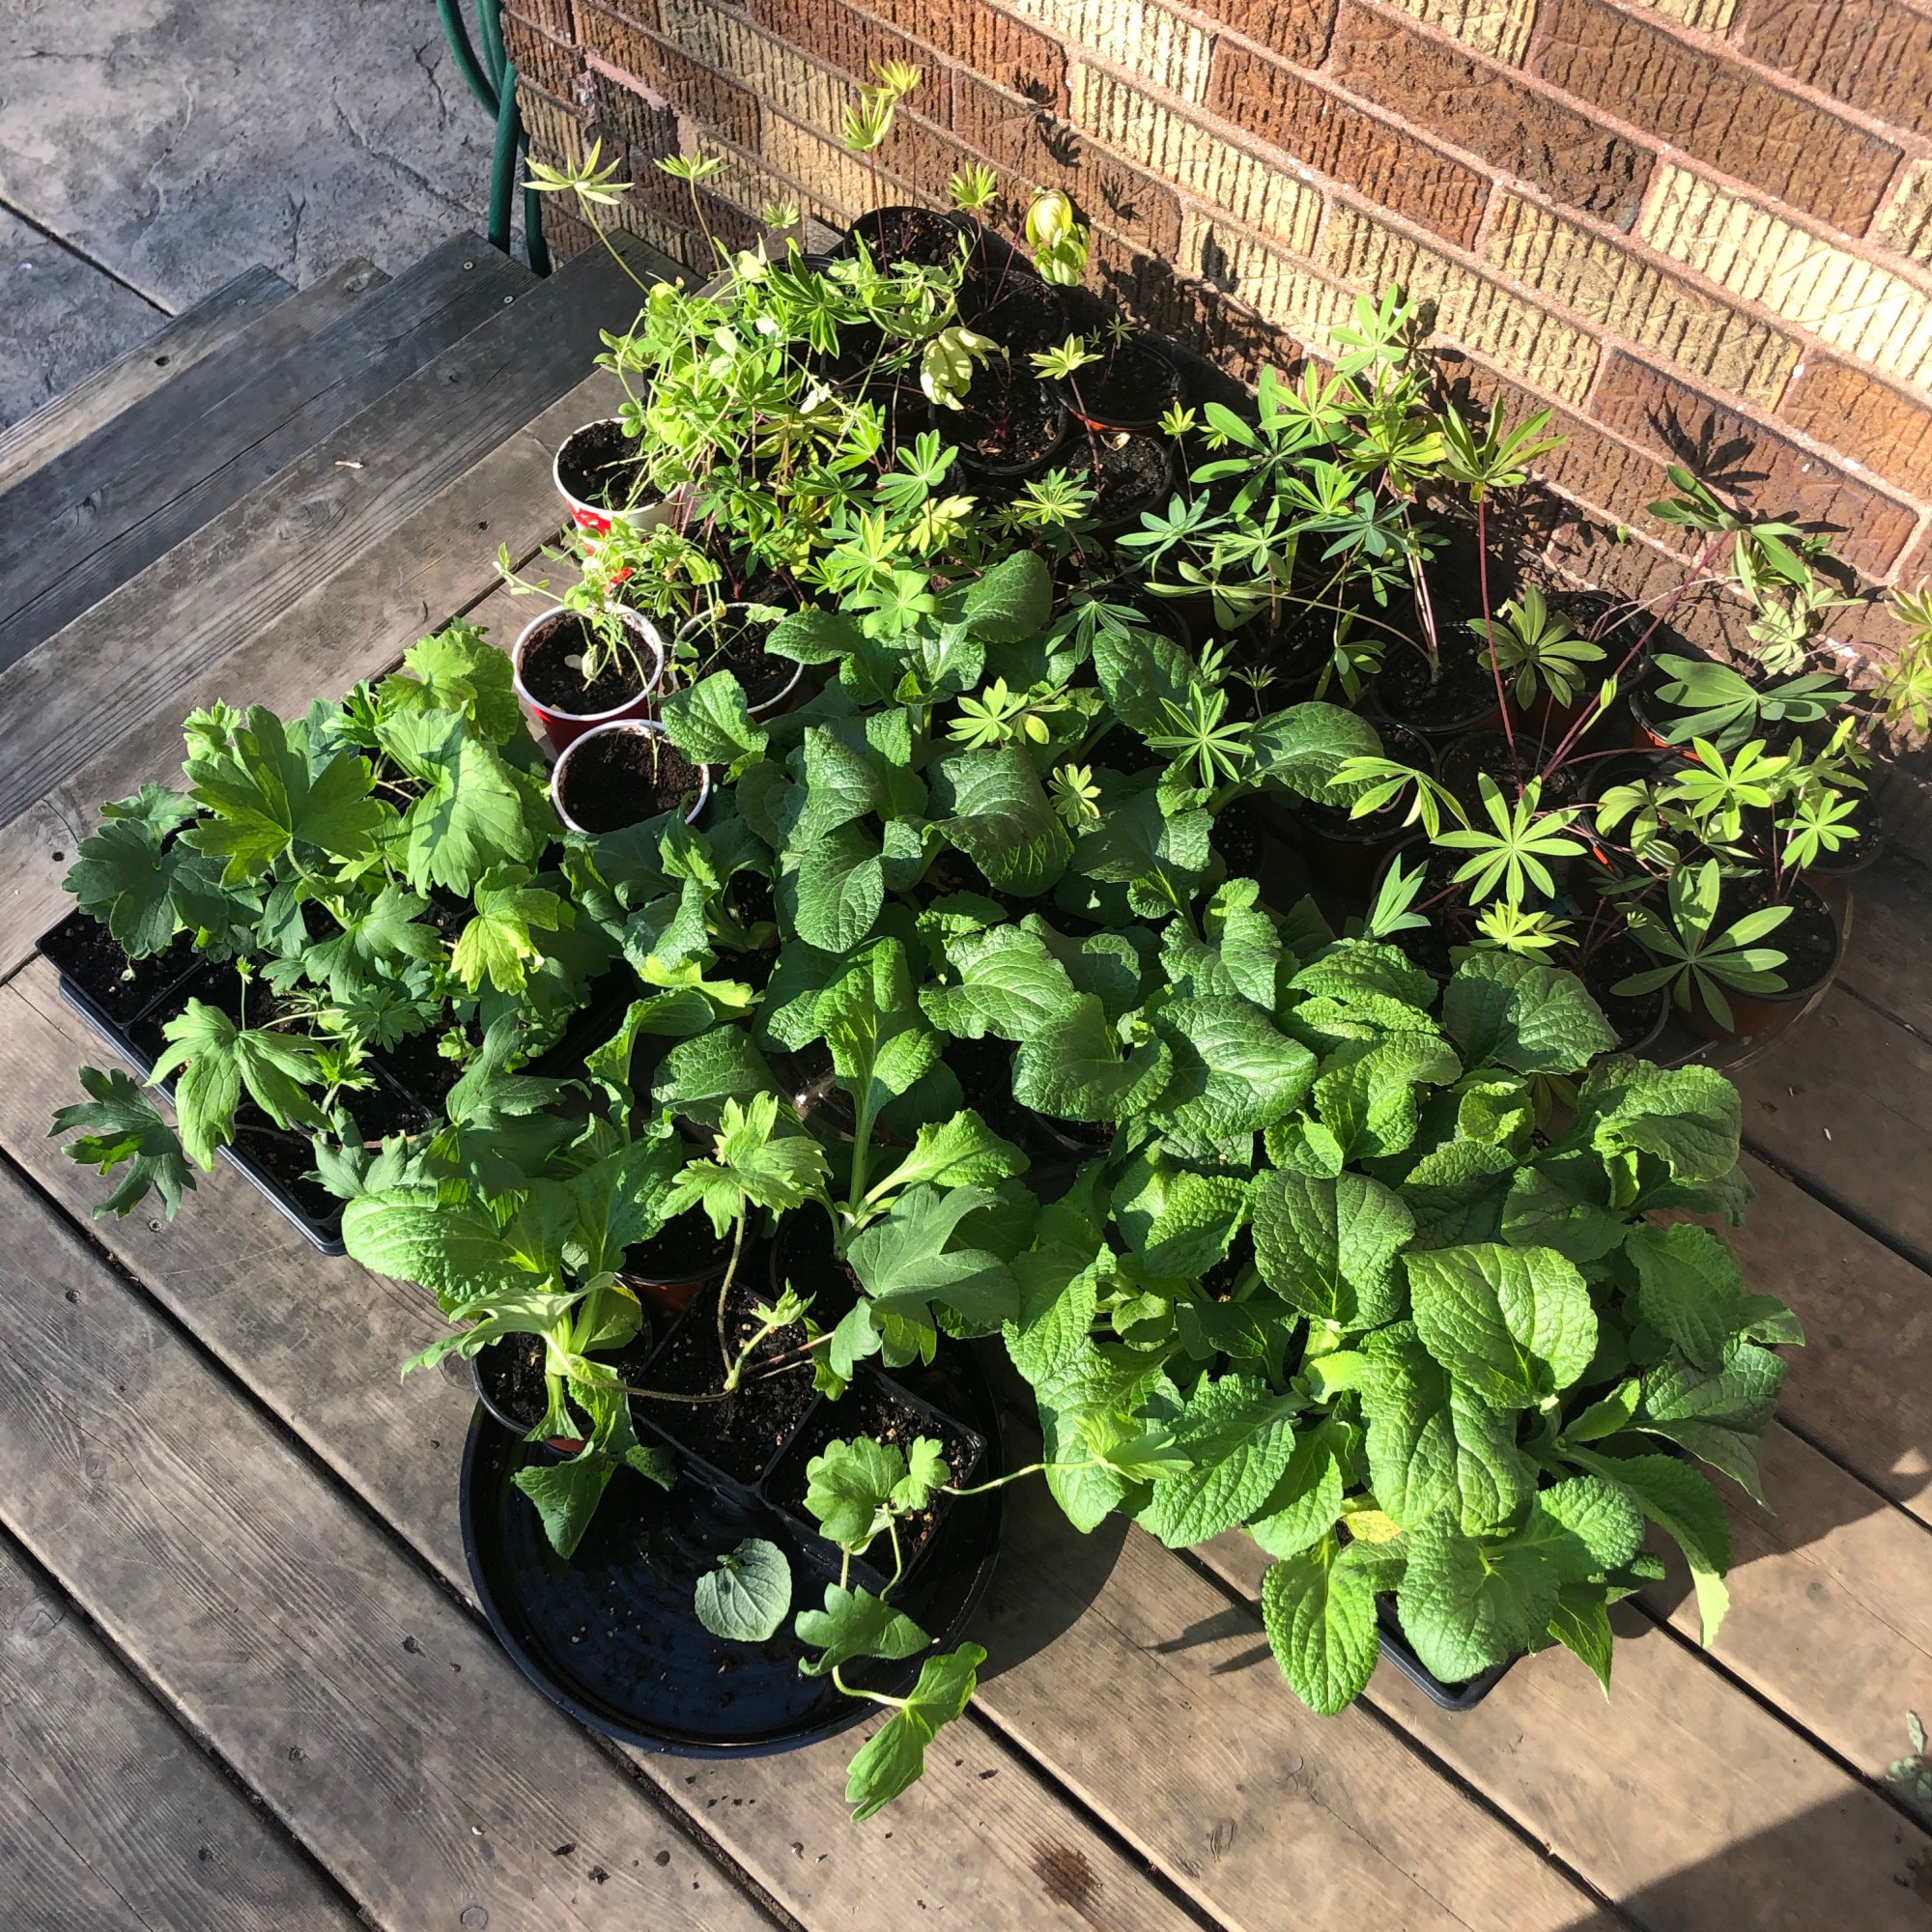
Our farm property has a ton of native milkweed growing already. My kids really wanted to try out a couple of different varieties. When you start milkweed from seed, it needs to be cold stratified. If you are interested in trying this, your seed package should help to give you guidance. Remember, you need to count back from the last frost date.
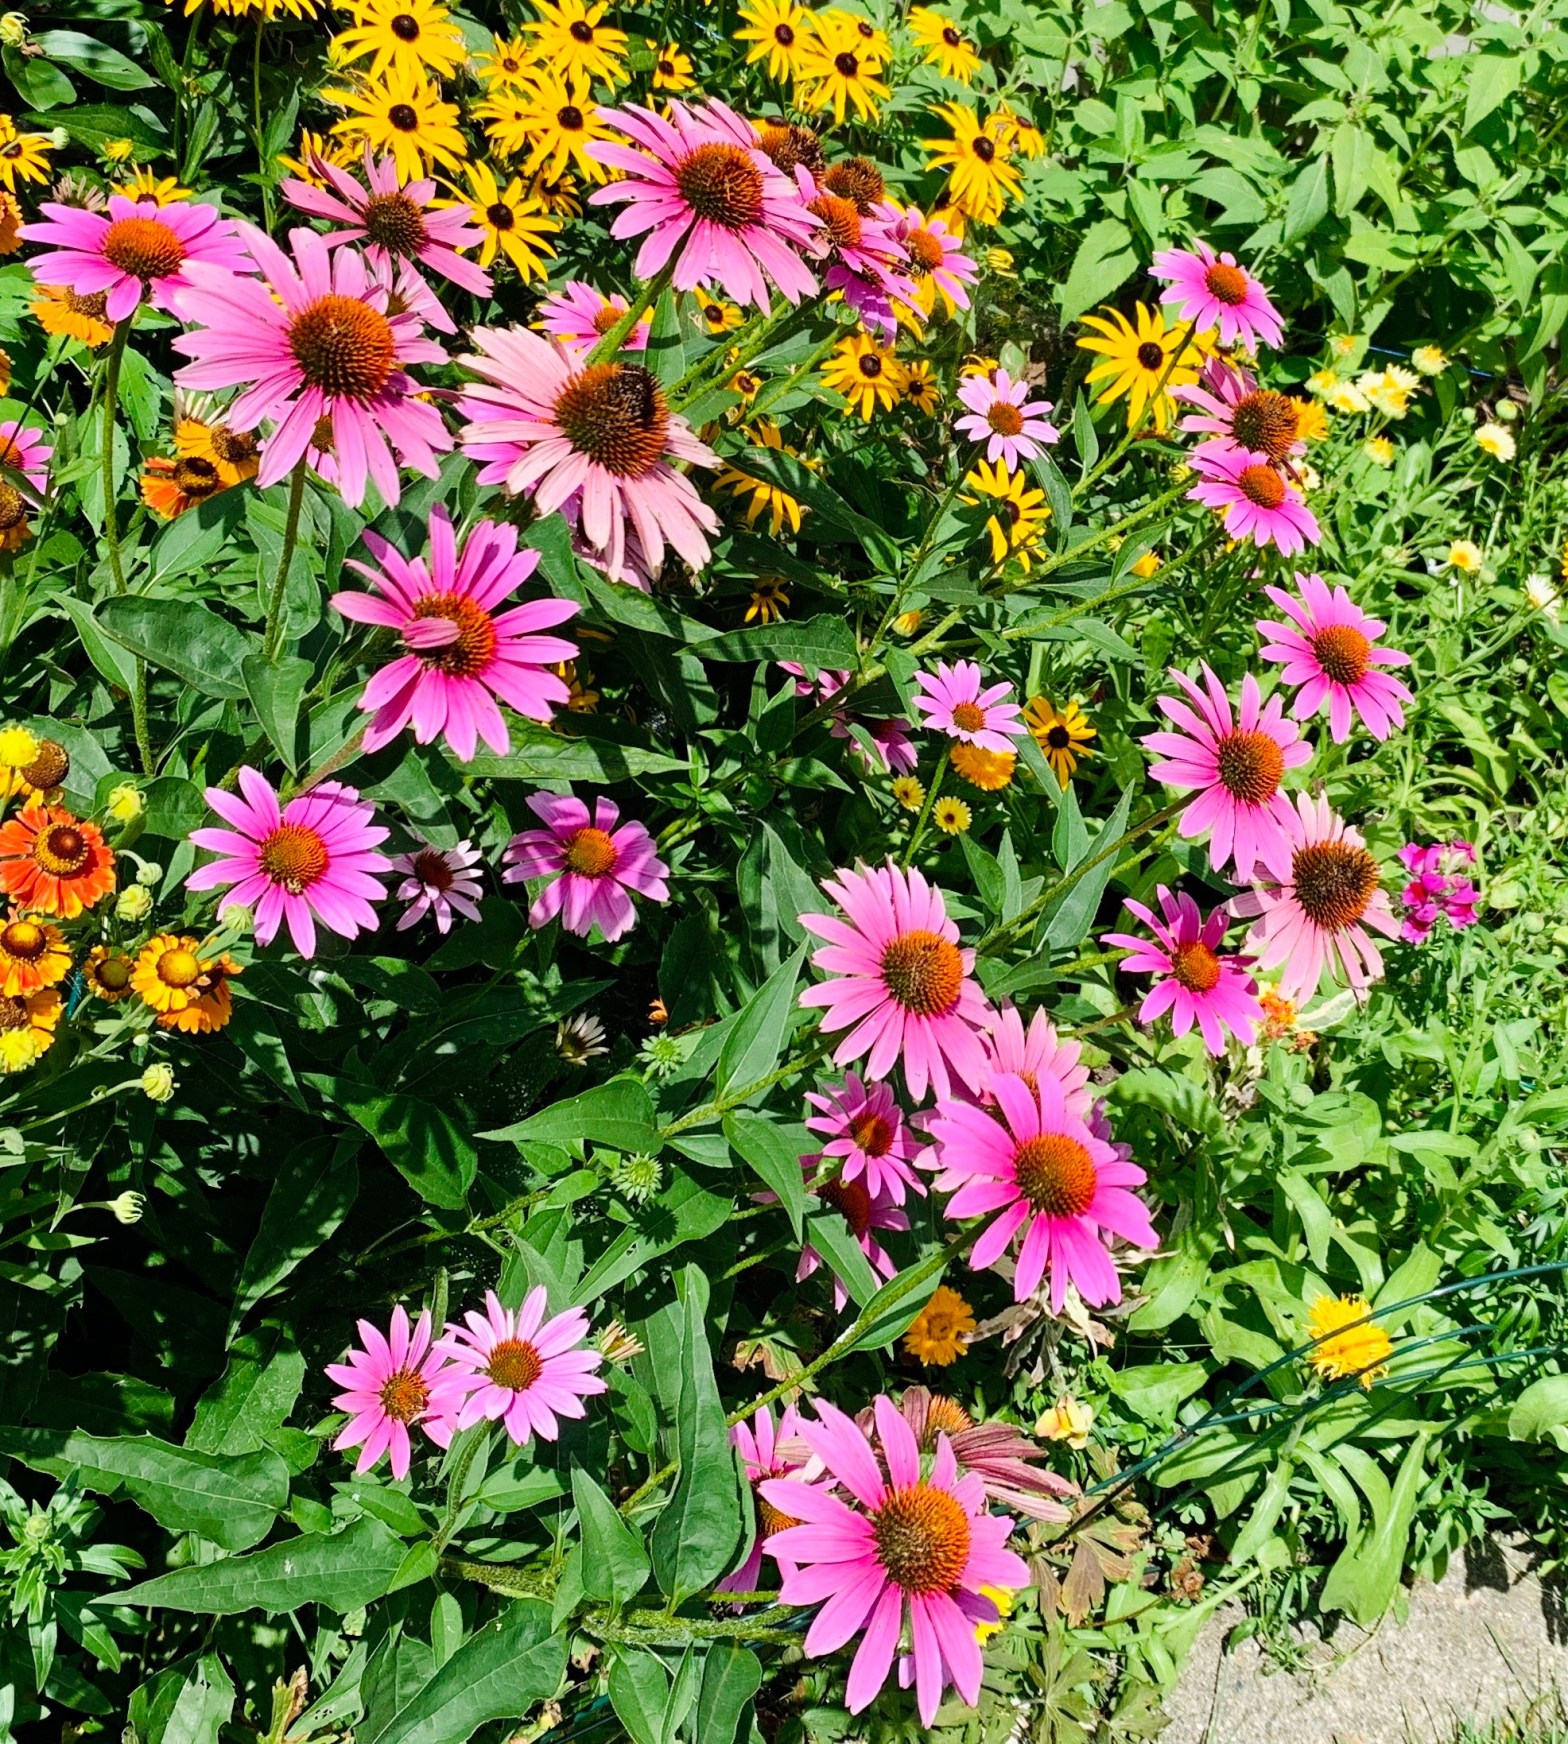
Over time, I have purchased many stylish (& often more costly) colors of echinacea & it almost always reverts back to the color purple. This has led me to the burning question, “Why does echinacea (coneflower) often revert back to the color purple after a couple of seasons?”
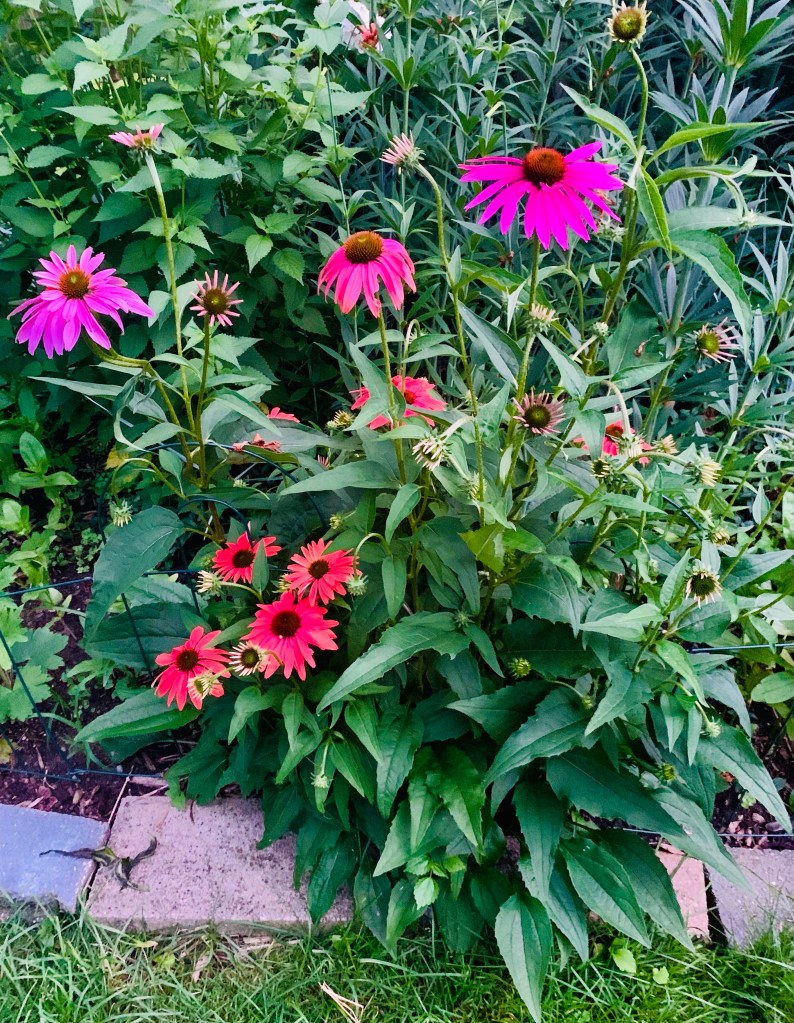
At one point, this hardy patch of echinacea (coneflower) had a white variety mixed in. Over time, the patch has reverted to purple. This is one red echinacea plant that I put in about 3-4 years ago. As you can see, half of the plant is now blooming purple! This patch is in a different bed, in a different area of my yard from the picture above.
I decided to try to find some answers.
From my research, the color keeps reverting, because purple is the dominant trait or because cross pollination occurred.
In nature, echinacea can come in purple, pale purple, & yellow. The different colors and varieties (for example, double or triple blossoms) come from humans self-pollinating the plants in labs and creating hybrids through vegetative propagation.
Although different color hybrids can still provide pollen for pollinators, the flowers with double & triple blossoms (also hybrids created by man) are not good for pollinators because the petals block the pollen. Also, some hybrid varieties are sterile & do not produce seeds like the native plants. This poses a problems for birds who depend on the plants for food.
This post is not meant to discourage you from this lovely plant. Echinacea is native to eastern & central North America. It is really easy to grow and comes back to my garden consistently every year. It can also be used in tea and tinctures because it has many health benefits. Plus, pollinators really love it!
It’s a good thing that I do really love the purple echinacea. I do not think I’ll be messing with hybrid varieties anymore.
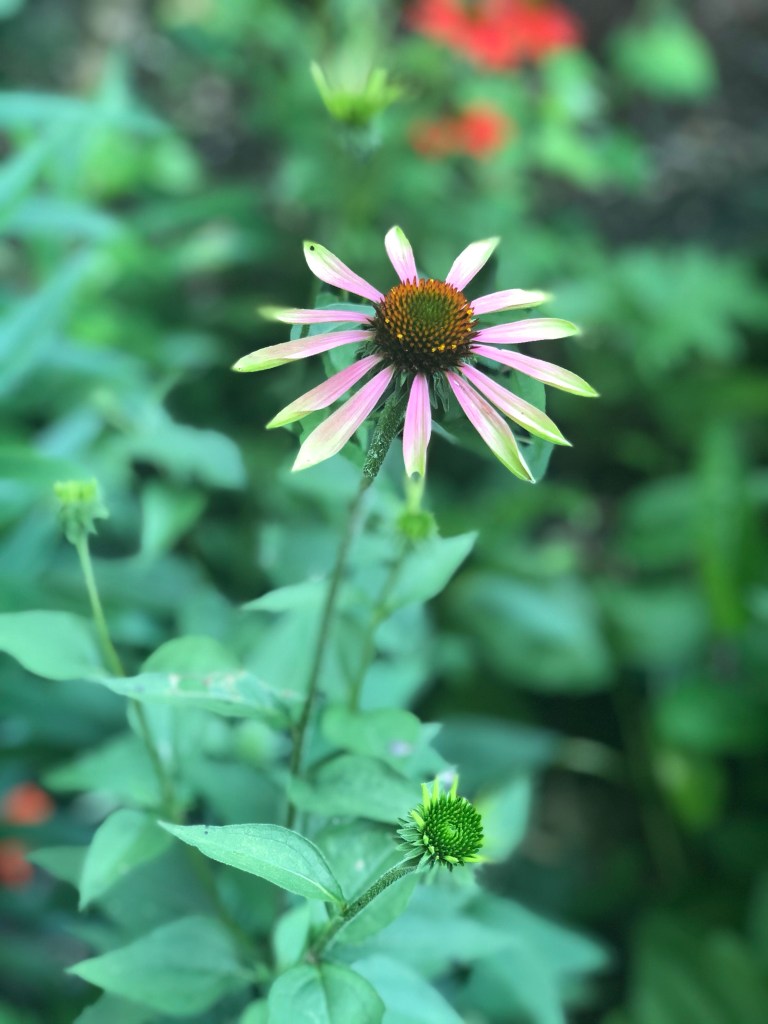
Two summers ago, Emily and I spent a pretty penny on matching “green twister” varieties. This last summer (2020), they were still green and purple. Time will tell whether or not Mother Nature reverts them back to purple!
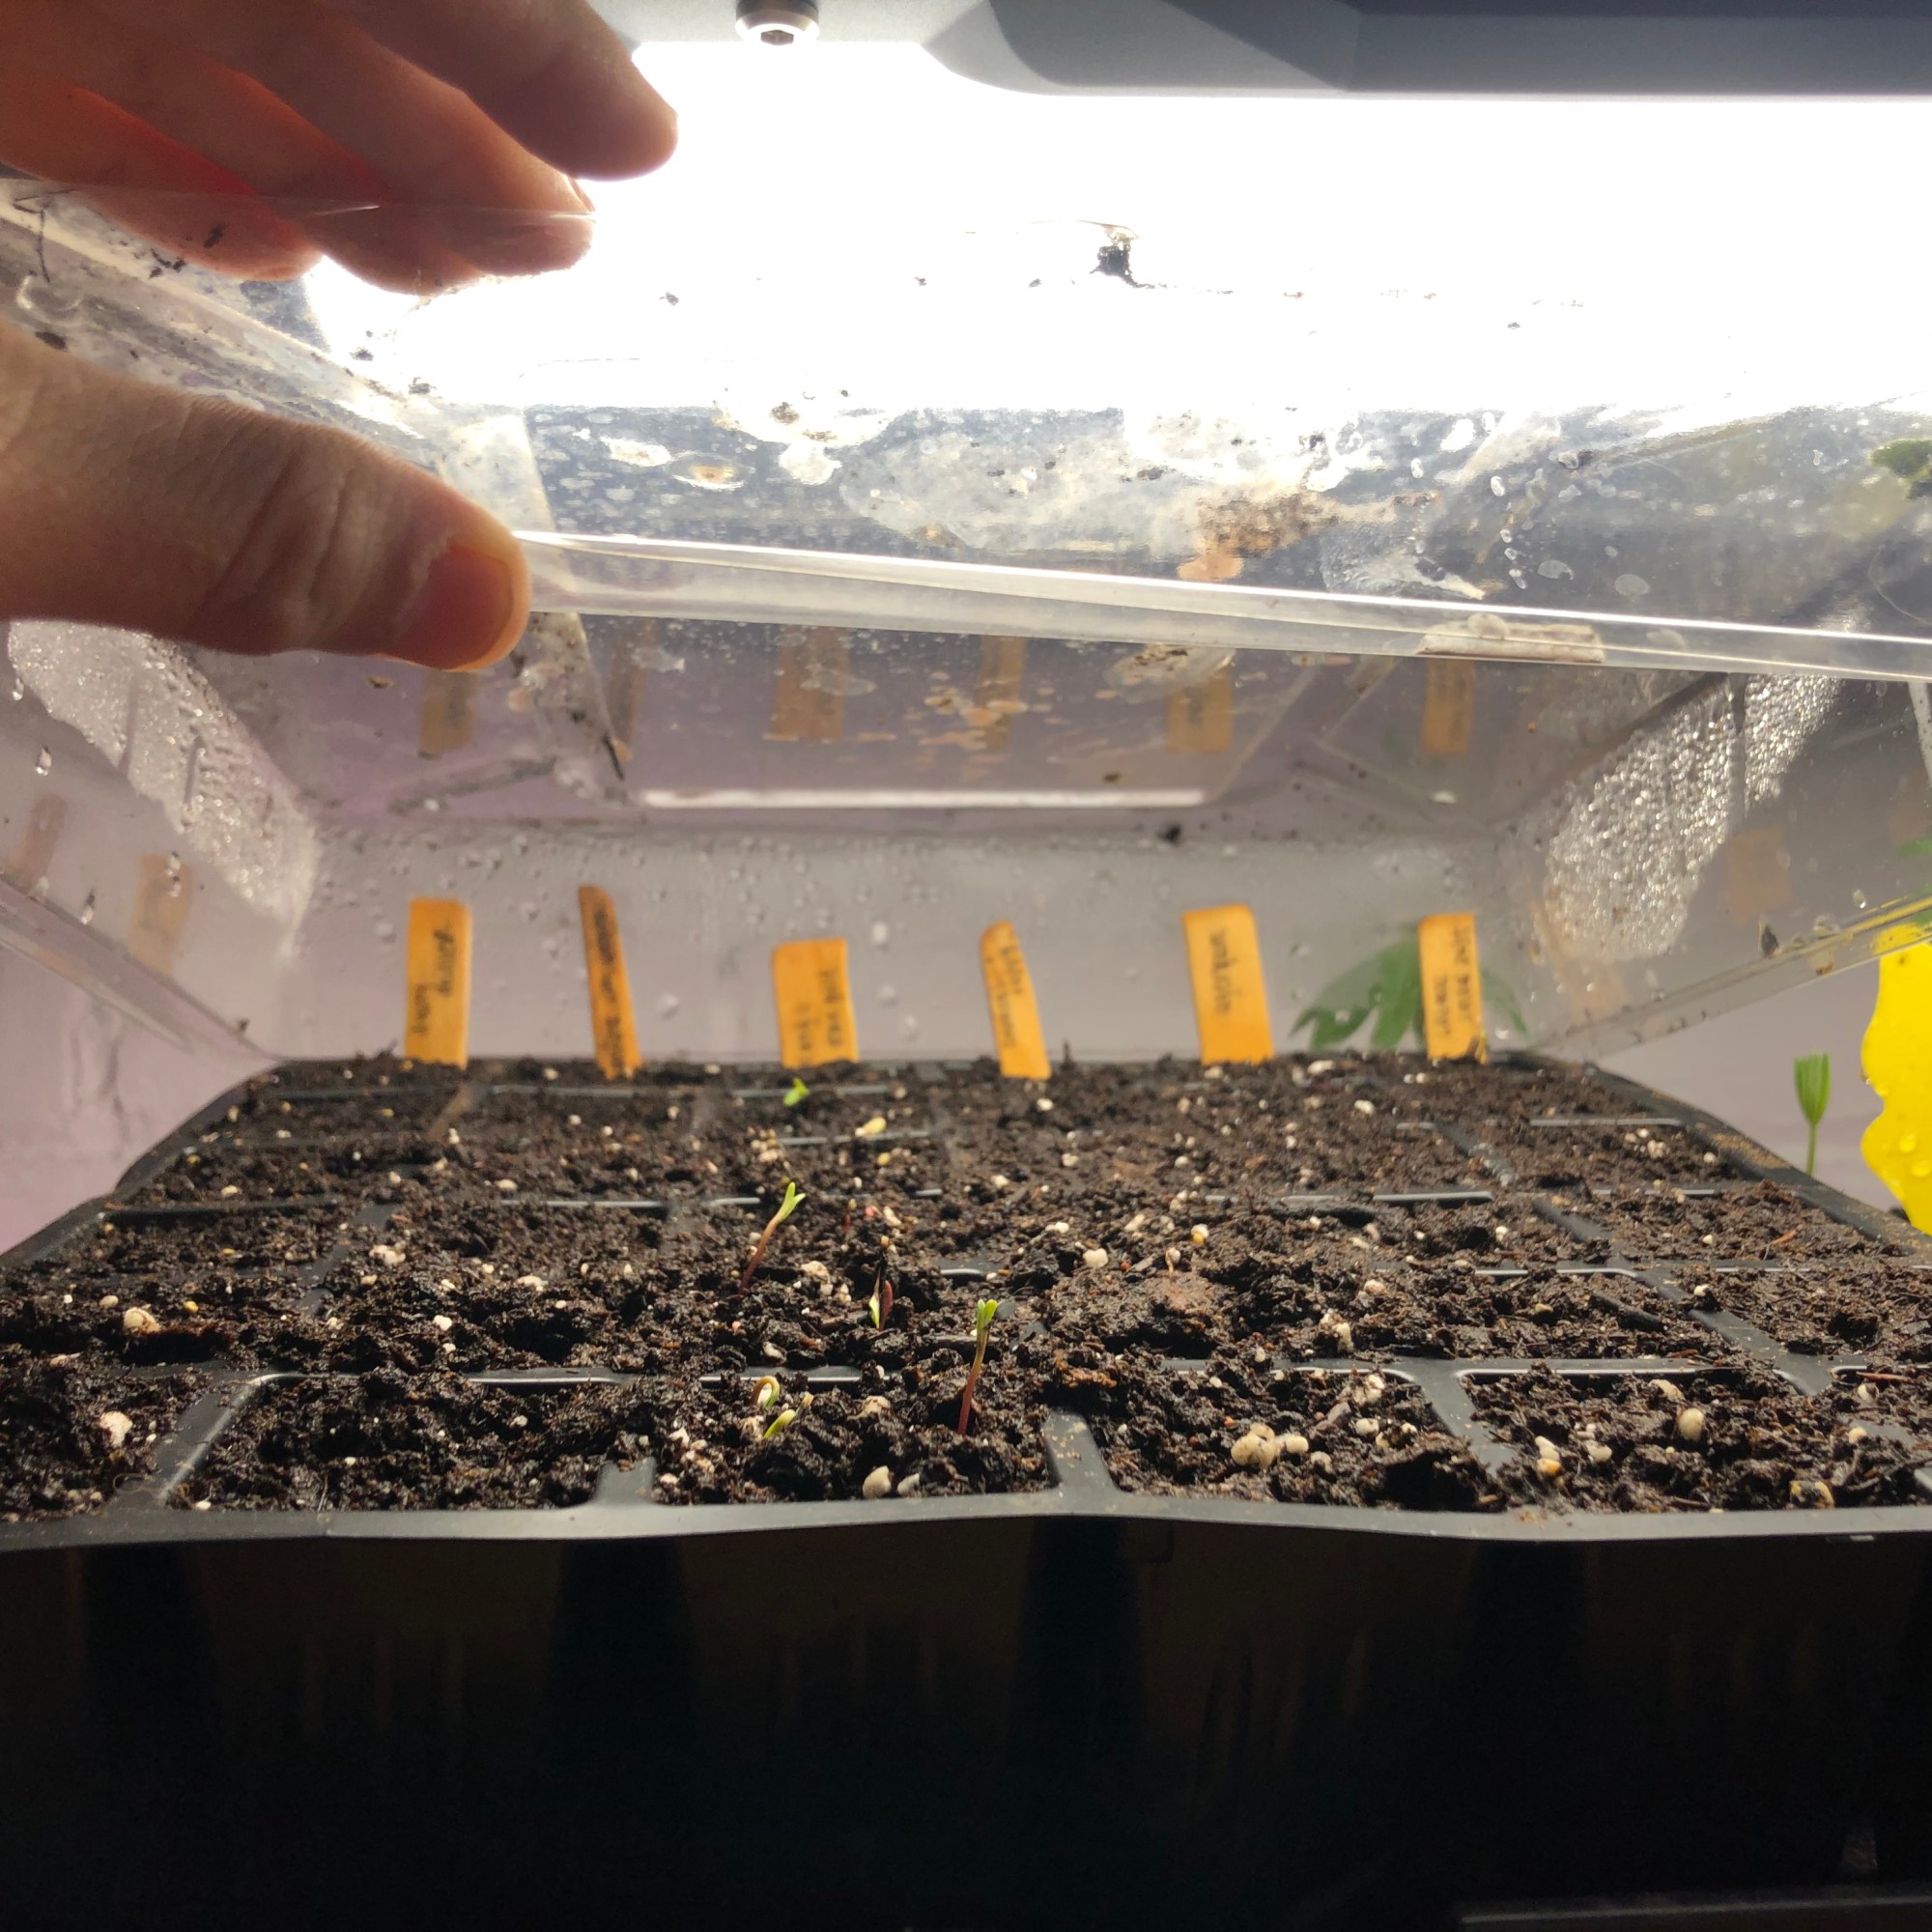
Hello! In my last blog post, I talked about what supplies you need to start seeds. This post is going to focus on organizing those seeds. If you only have a couple of packets, you probably don’t need to fret. If you have piles of seeds like Emily and I do, some organization will help you to keep your ducks in a row.
A few weeks ago, I went through and organized my seeds. It was a hot mess. Murray (my Brittany) was not impressed with my disorganization.
I added labels to each of the boxes. You can see what labels I used in the photo below. What labels you use will depend on what type of gardening you are doing.
After I organized, I was able to see what seeds I had & what I needed more of. Immediately after I finished my organizing, I went onto Baker Creek’s website & ordered more veggie seeds.
Yes. I know. I am a seed hoarder!
To get all of my seed information organized, I used a Google Sheet that Emily had started for her seeds. I changed it around a bit. I have tabs at the bottom for flowers, vegetables, herbs, and direct sew. I have included my direct sew seeds (direct sew means that you just plant the seeds right into the ground outside) because some of the seeds that I need to direct sew are actually put into the ground before the last frost date.
In order to figure out when you need to start your seeds, first figure out the date of your last frost for your area. In Southeastern Michigan, Google says our average last frost date is May 20th. I counted backwards from that date on my calendar. Most seed packages will tell you how long before the last frost you can start your seeds.
Other important information to add to your seed sheet is the name (you might want to include manufacturer as well so that you can remember next spring), plant spacing, seed depth, height, sun requirements, and other special directions.
Some of my packages did not have any information on them. When this happens, just Google the exact name of your seed + growing instructions. For example my coleus did not have anything written on it, so I Googled, “coleus pinto mix growing instructions.”
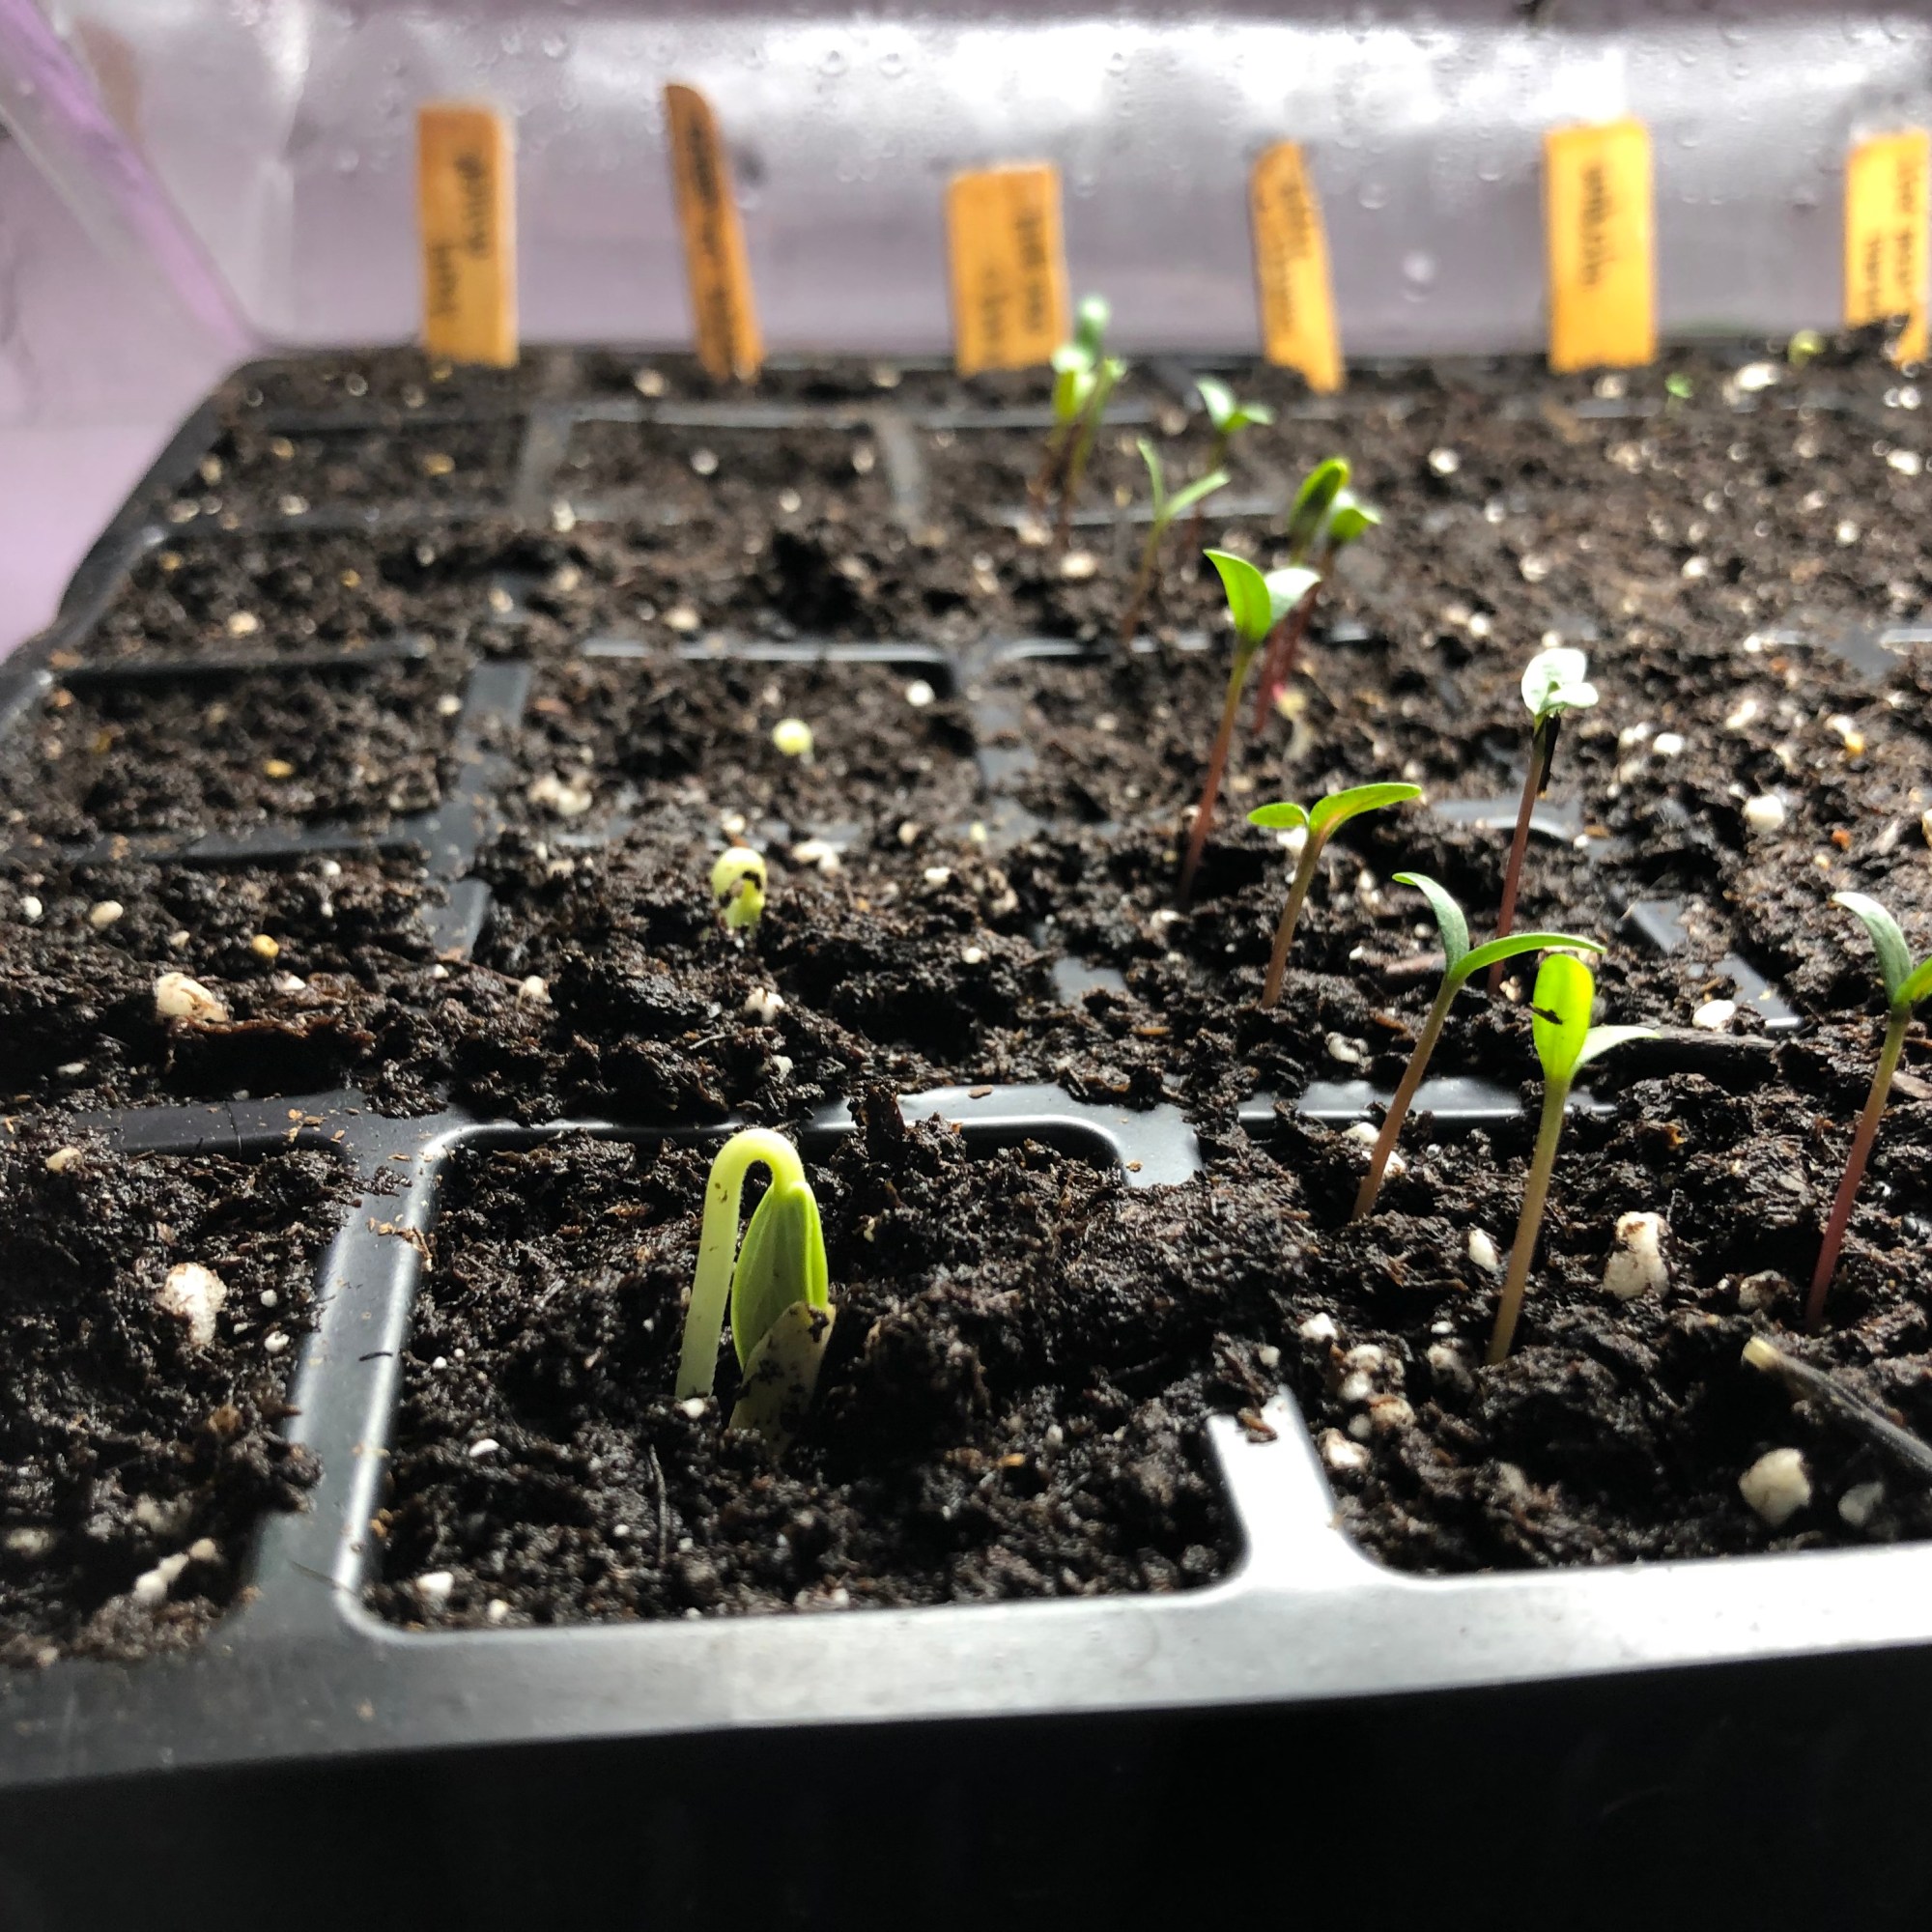
I am not going to lie to you, this exercise took me some time. However, it was well worth it. You don’t want to start your seeds too early or too late. They are kind of like a puppy. They need to be with you for just the right amount of time before they go out into the real world to do their thing.
Recently, we received a message from someone who has been following our Instagram feed who told us that she would like to try starting her own seeds this year and wanted to know what she needs to get started. Emily and I figured that a lot of people are probably in the same boat. Below, we have compiled a list of supplies that you may want to have to get started.
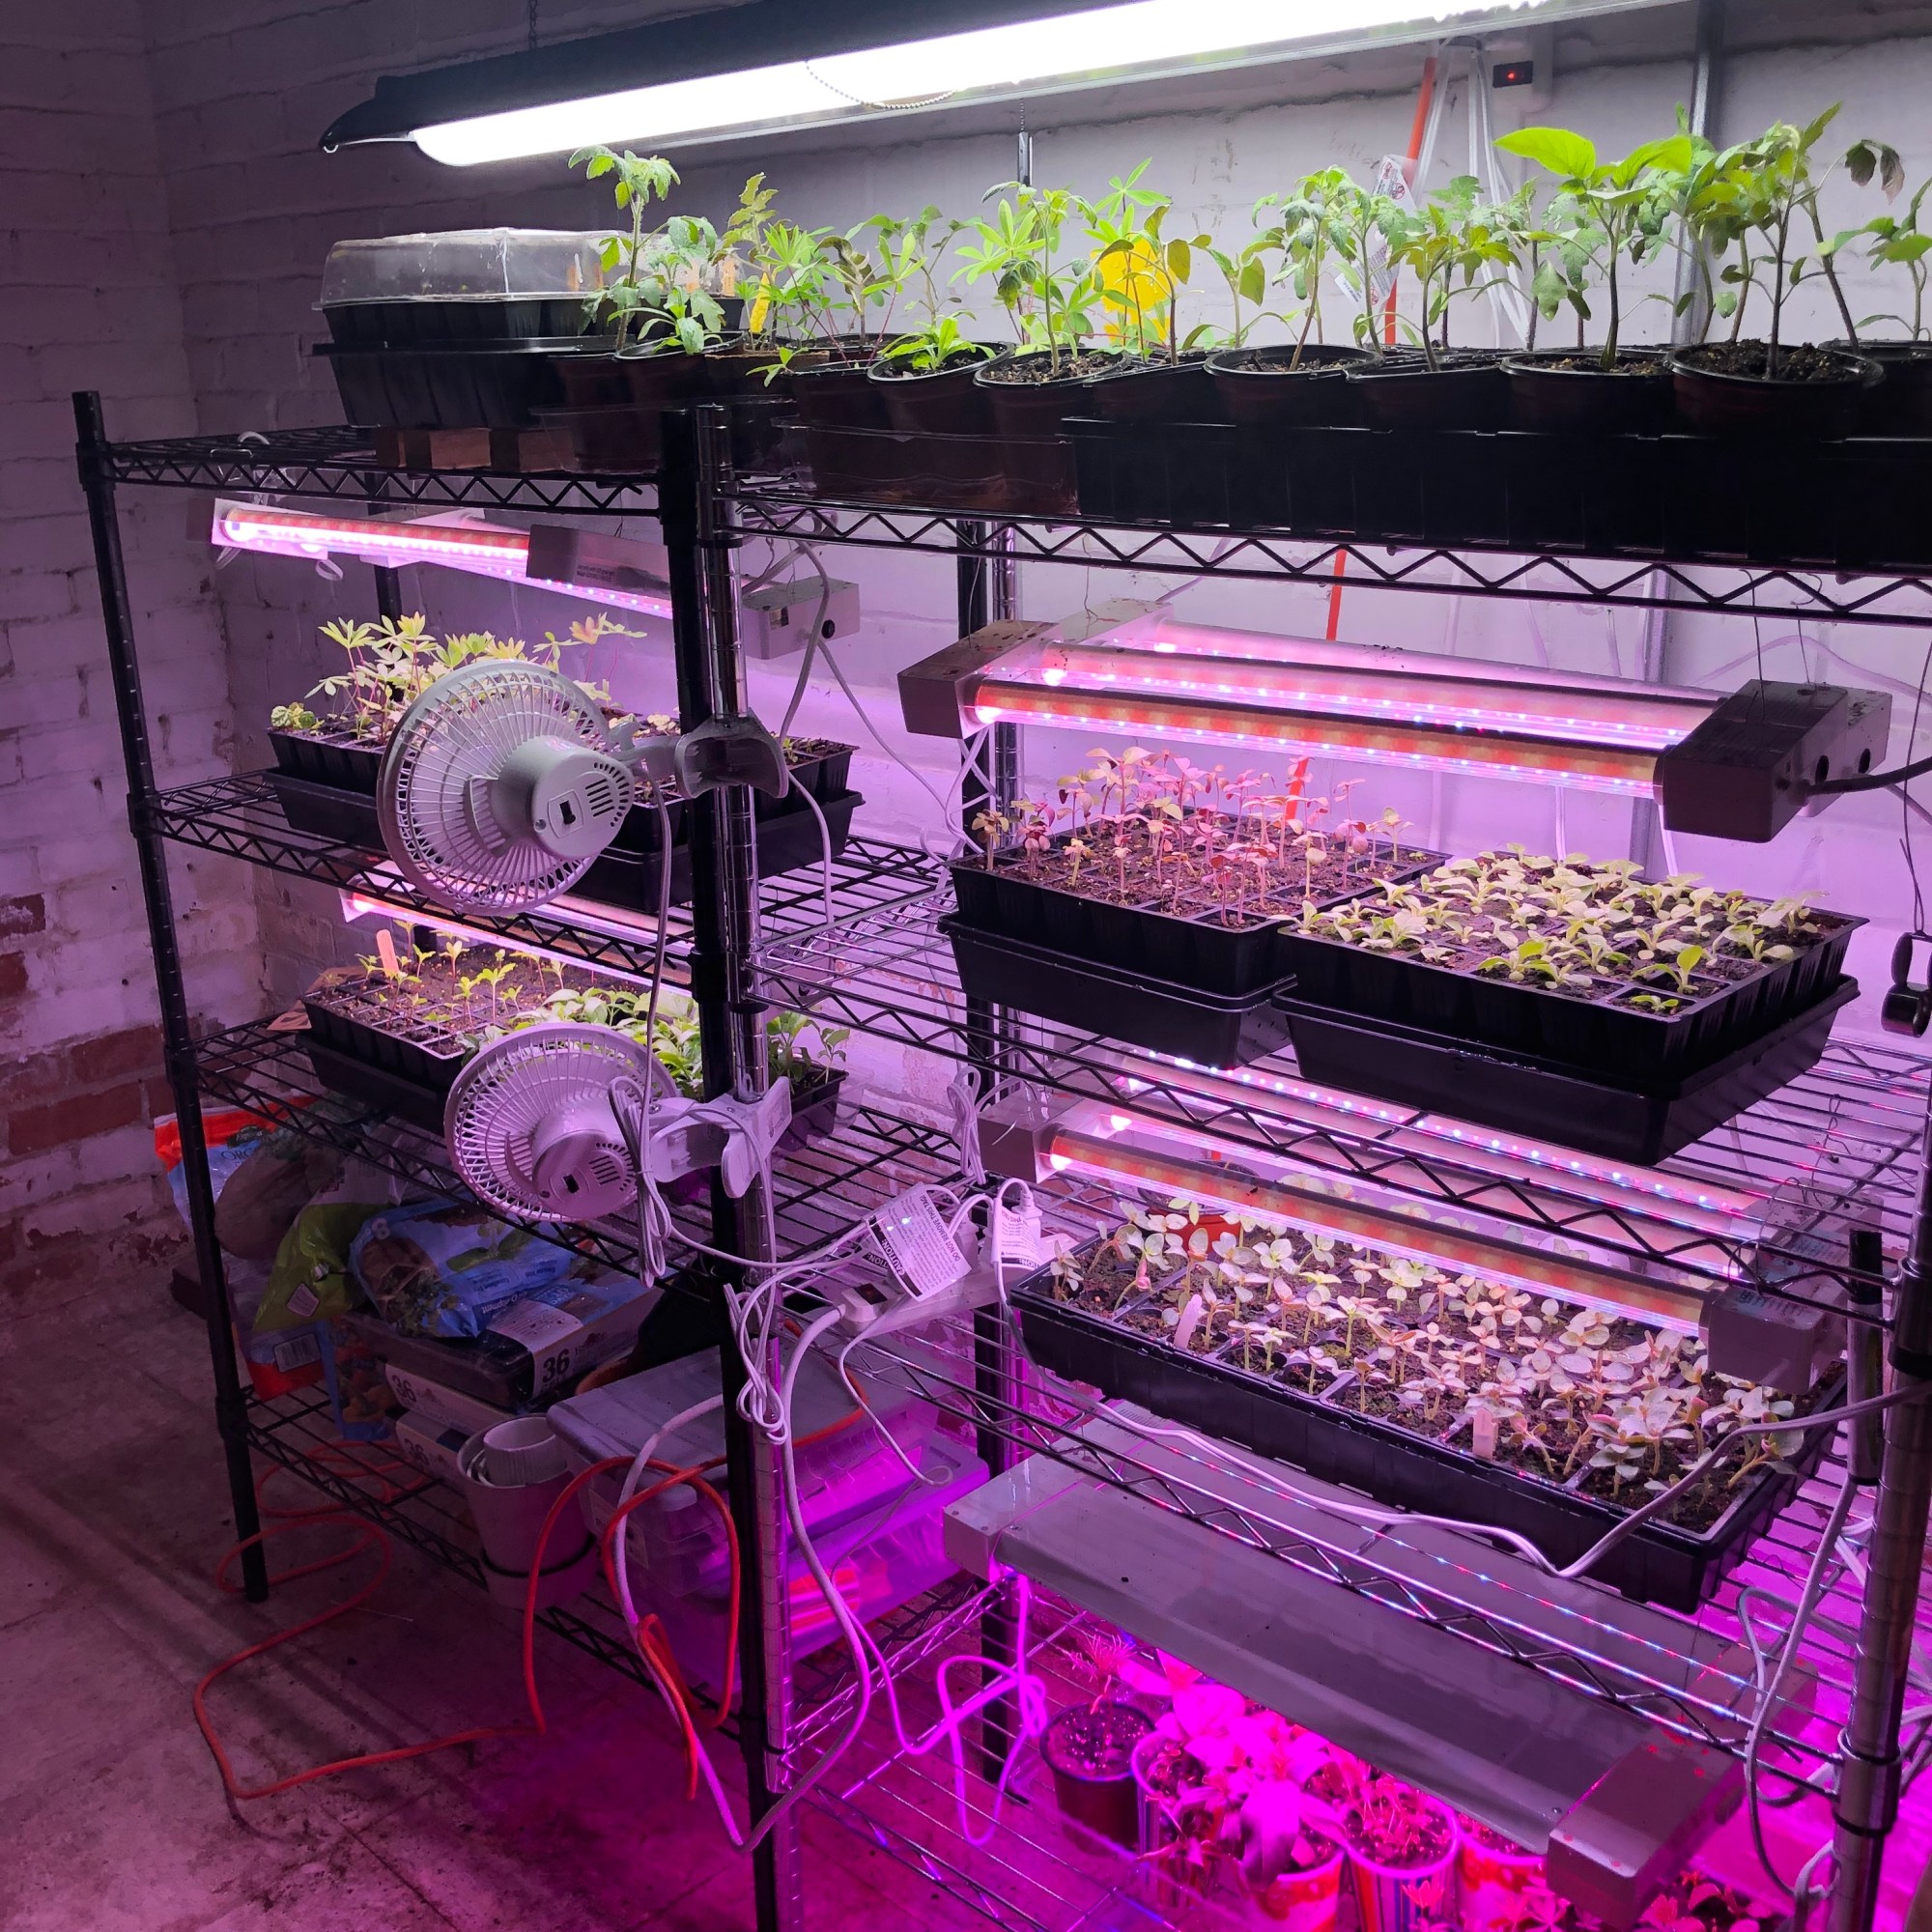
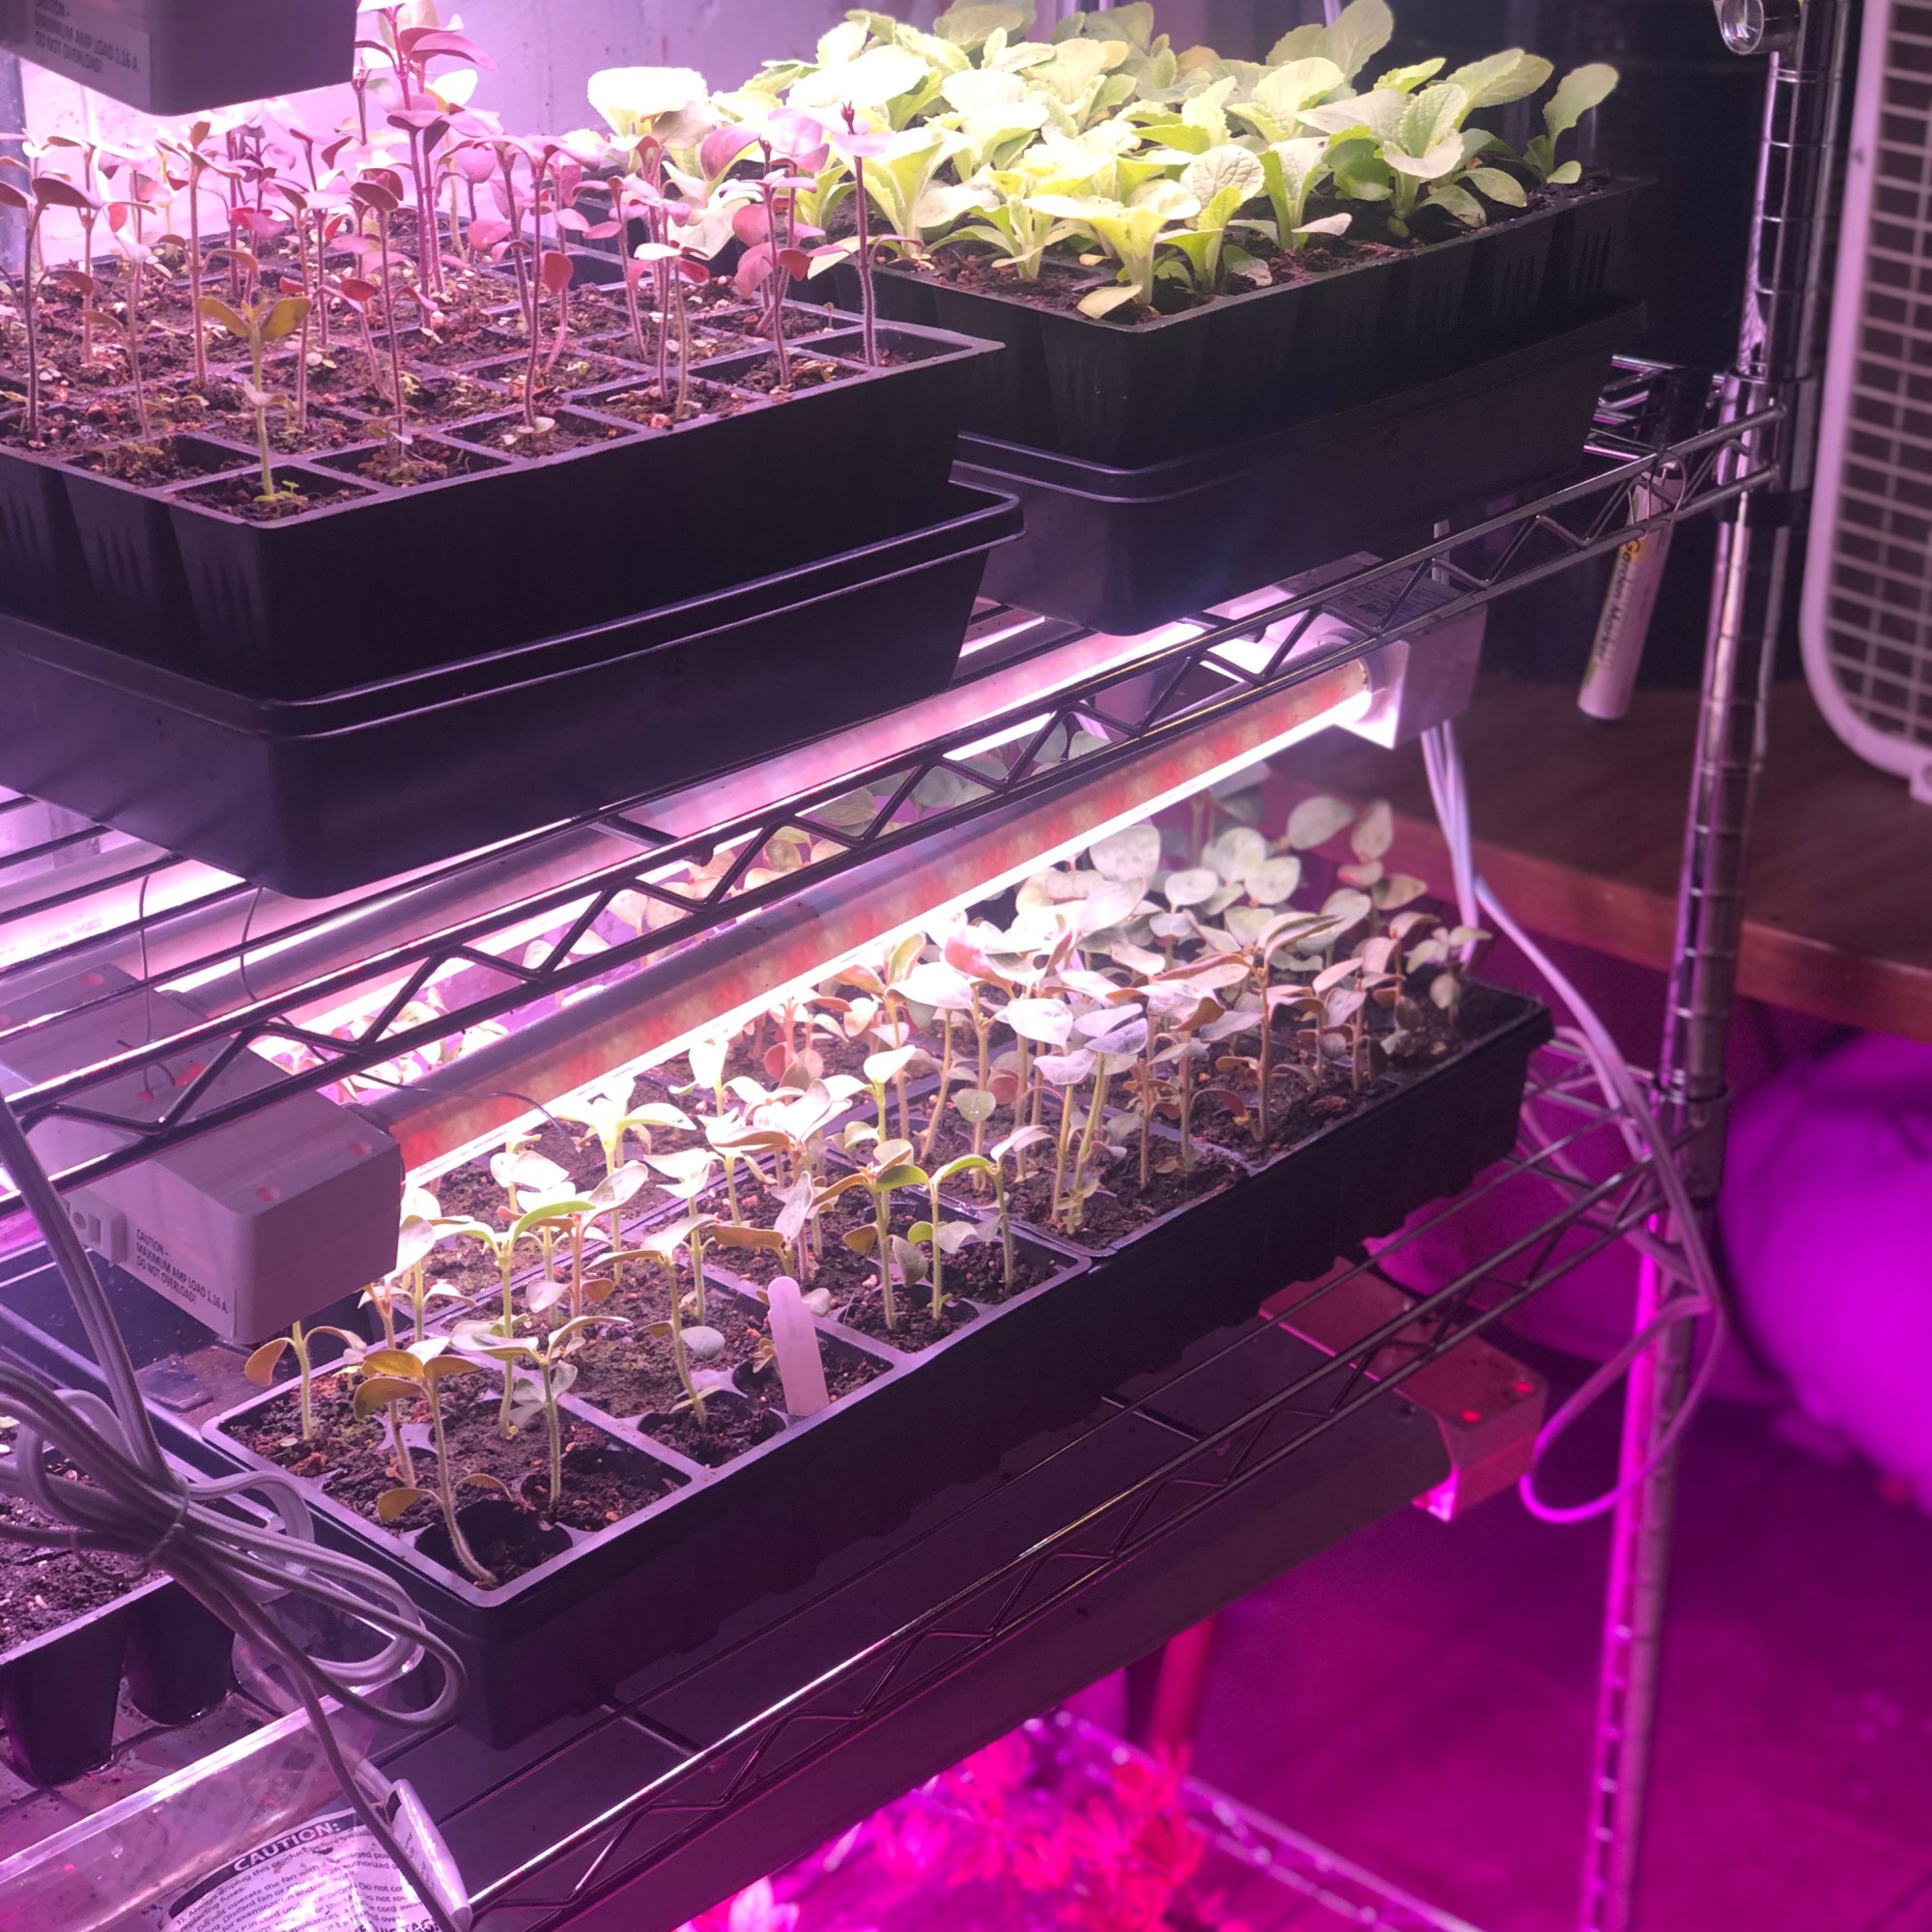
Last year was my first year starting a lot of seeds. I did not have nearly as elaborate of a set-up as Emily, and my seed sewing started to take over my kitchen. My family ended up eating in the dining room, so I did not have to keep moving my new plants back and forth. I was SO excited to get the plants out of my house and into the ground. This year, I ordered a grated metal shelf.
Another lesson that I learned is that I want to use trays. As evidence below, I used yogurt cups and empty milk gallons last year. The yogurt cups were fine, but Grow trays are much more compact and will keep your seedlings more compact and organized. I would not recommend using Milk Containers like I did. It was too difficult to get my seedlings out . I ended up planting the whole chunk of soil as one big plant, which caused my plants to not have enough room to grow.
Emily uses a room in her basement. Every time that I went to her house, she would just mutter to herself, “I have a lot going on!” She really did have a lot going on and has plans to have even more going on this year!
The list is a combination of items that Emily and I find necessary. They are divided by “Imperative” and “Makes Life Easier.” Emily and I are not Amazon sponsored. It is just an easy link to share with products we have used. We always love supporting our local nurseries and have also purchased many things locally.
Imperative
SEEDS!! What are you growing?? Many of the seed suppliers are having a difficult time keeping up with the demand. We recommend that you order soon, so that you have time to ship and get the seeds started in time. Some of our favorite seed websites are:
https://www.johnnyseeds.com/ **We love Johnny Seeds, but they are only accepting orders from commercial farmers this year.
Grow Lights: This is very important (especially in areas that are cold and dark in the winter months). Even if you put the seeds next to a window, it’s probably not going to provide with enough light to get those seeds going. I purchased 4 of these grow lights, one for each shelf. Last year, I just rotated what was under my light. Remember, plants like to have light and dark times. Do not keep your light going all night.
Did we forget anything? Feel free to comment below!
In our next blog post, we are going to show you how to figure out which seeds needs to start when. We will even share Emily’s spreadsheet with you. Stay tuned!
After my blog post about propagating in water yesterday, Emily made a short video to show off the growth on her current propagations in her Ikea greenhouse cabinet.
**After we rewatched the video, we realized that she said the new leaves would grow on the nodes. She misspoke. The new roots will grow on the nodes. Also, it is a Brasil Philodendron, not a Rio. We are still getting used to videotaping ourselves!
Did you know that you can break off a piece of a plant and use the broken off piece to grow a new plant? Furthermore, it’s fairly easy to do!
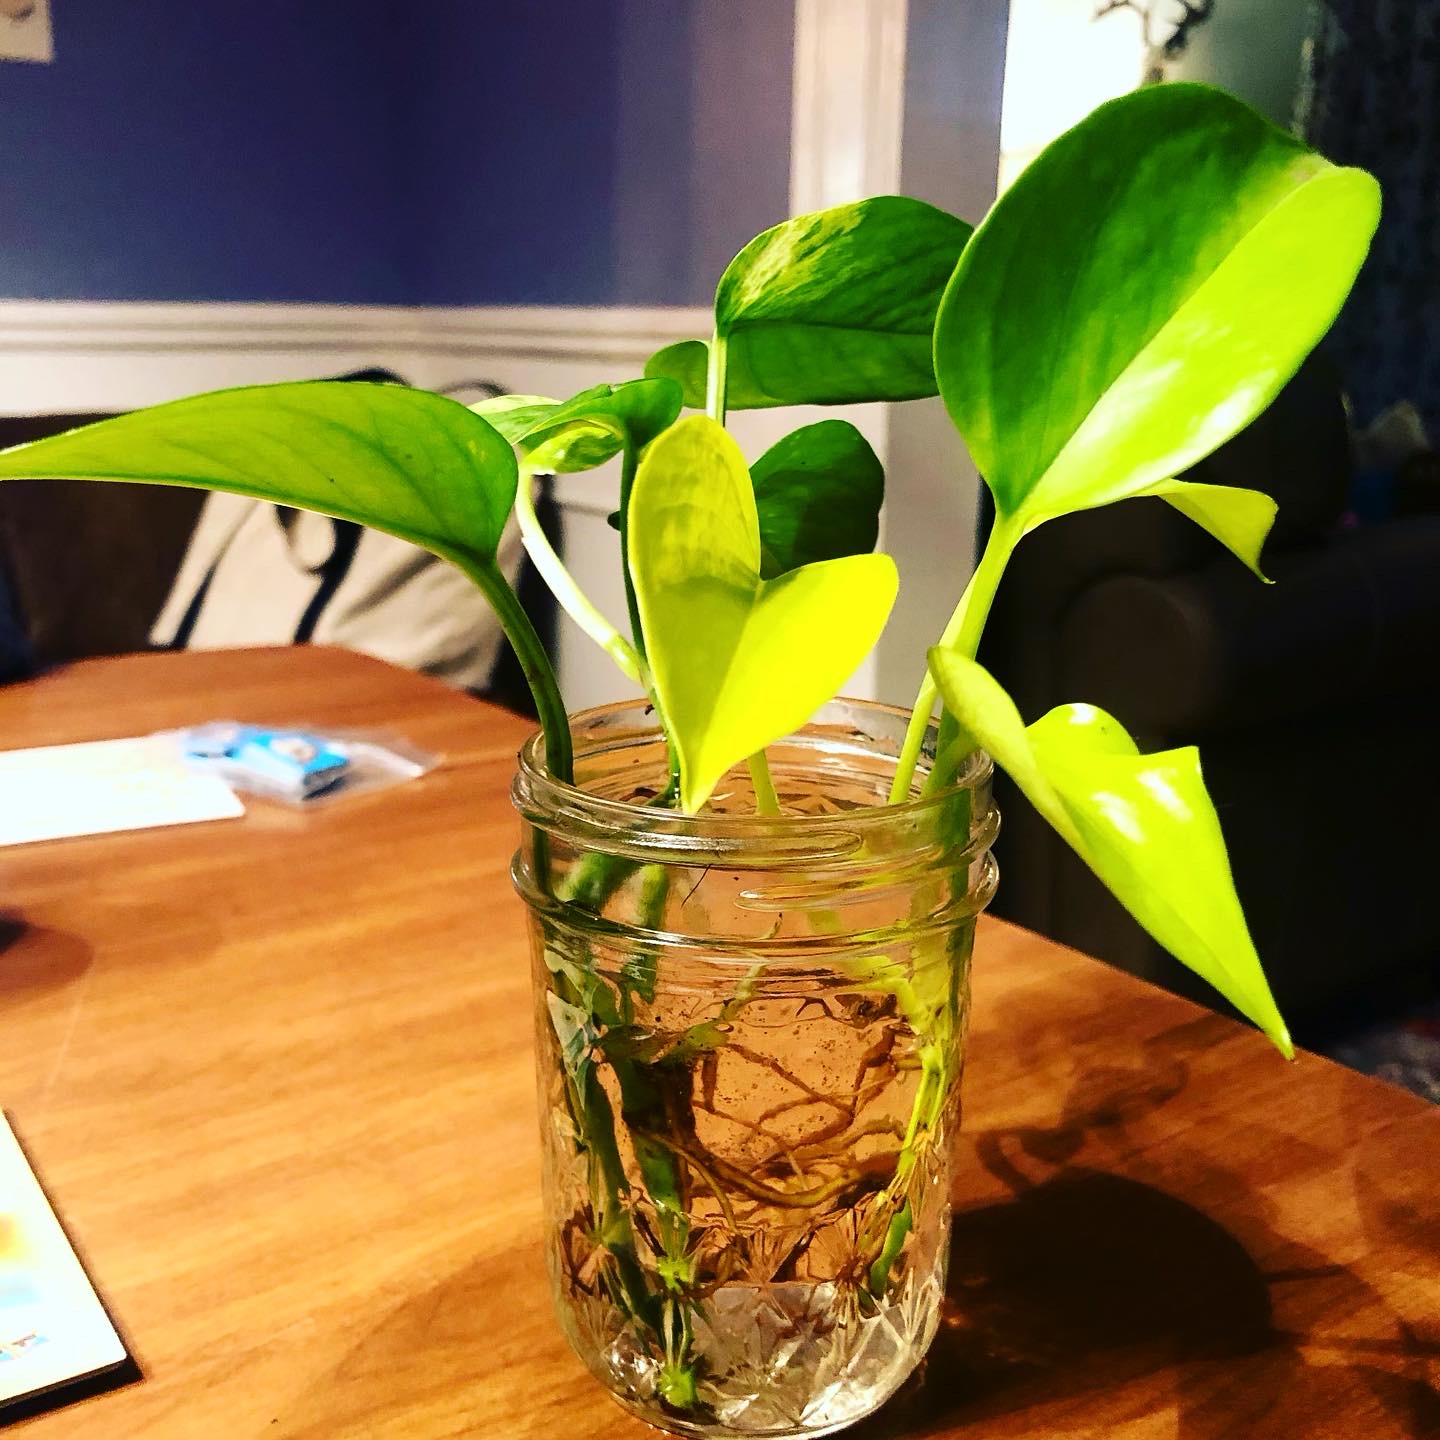
A few months ago, Emily cut off a few pieces from her Neon Pothos and Marble Pothos to share with me. She took the pieces and put them into a jar with water. After just a few weeks, new roots started to grow.
After the roots were long enough, I transplanted them into my cool hanging pot that my friend of mine from college made (#ceramicsmajors). She started an adorable store in Marquette, Michigan called Revisions. If you ever find yourself in the Upper Peninsula in Marquette, you have to check it out. They sell plants, vessels for plants, and different unique gifts.
To pot my newly rooted plants, I used a mixture of potting soil and perlite. My pretty hanging pot does not have a drainage hole, so perlite should help with drainage and help my pothos not succumb to root rot.
One thing that you might notice about the picture below is that I have two different types of pothos planted into the same pot. As long as your plants have similar light and water requirements, there is no reason for you to not mix and match in the same pot.
Step-by-Step directions to water propagate:
Make sure that your plant that you would like to propagate is one that can be water propagated. A quick Google search should provide you with an answer to this.
Select which stem of your plant you are going to use to propagate. You will want a stem with a few leaves on it for the best success.
Using sharp, sterilized scissors cut the stem just below a node. The node is important to include in your cutting because this is where you roots will grow.
Fill a jar or vase with filtered water. (I am not going to lie. I always just use water from my faucet, but I know that many people would tsk tsk this.)
Place your jar in a place that has the appropriate light requirements for you plant.
After a few weeks, you should see root growth. When your roots are a few inches long, you will be ready to pot in soil. Easy peasy!
For years, I teased my brother (Ben) about his houseplant addiction. After getting a few houseplants, I seem to have caught the bug! Sorry for harassing you, Ben!
Ben has an amazing #cacti collection. He started collecting several years ago, before the houseplant trend and got to up to over 300 plants. His cacti are currently housed with at my parents’ house since he is in the process of moving and prepping for a new baby. Each time we go over to visit my parents, my kids have to go “visit Uncle Ben’s cactuses.” Charlotte (6) would have her own collection of prickly friends if I would let her!
Aside from the prickly nature of cacti, if you have a sunny spot in your home, they are a fairly low maintenance plant. They do not require much water at all during winter months. From Spring through fall, they need to be watered more frequently.
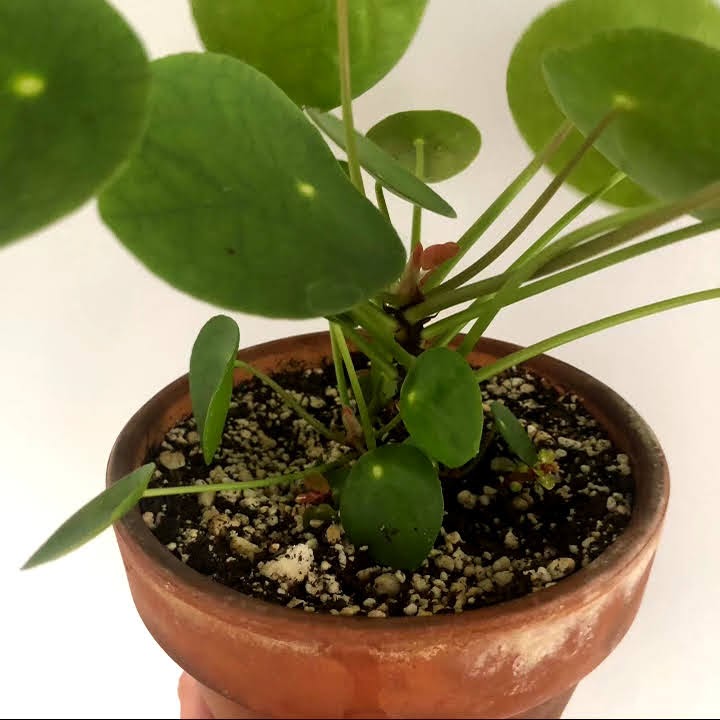
Pilea peperomioide aka Chinese money plant, UFO plant, or “the plant that makes babies to share” according to Laura’s kiddos.
One of the easiest starter plants for any beginner plant lover (or anyone who just needs green). Keep in a bright spot, well draining soil (add perlite to potting soil), water once a week only when the soil gets dry and watch it push our new leaves all the time.
And you may be wondering what those little offshoots at the bottom are—- they are pups (or babies). Wait for them to grow, then remove it from the plant to make another. Emma, Laura’s 4 year old, has been begging Emily to share. We just had to wait for it to be big enough on its own. In the second photo, Emma is proudly holding up her new baby, and maybe in a few months she’ll be able to share with her siblings.
Laura: My mom loves perennials and has always had a giant perennial garden. As a kid, she would often have me help her in the garden and allowed me to cut my own flowers for bedroom bouquets. I come from a large family and a couple of my aunts are also avid gardeners. They have always been there to answer plant related questions for me, scour nurseries for goodies, and pull weeds alongside me.
When we moved into our home, I was blessed to buy a home from a perennial lover who had passed away. Although her style was different than mine, I have embraced and nurtured what she left and added my own style to it. I love the fact that I am caring for plants that she planted a long time ago.
As for houseplants, I blame that all on my brother (Ben) and Emily. Ben has a very impressive collection of over 300 plants. His cactus collection is on point. I will post pics of it on Instagram (@trowelsanddirt) and on the blog soon!
Emily: Like Laura, I grew up with parents that loved to garden and at an early age would be in the vegetable garden, visiting farmers markets, or plant flowers. One of my first memories of gardening was when I was little and harvesting raspberries and found a dead bird in the patch. It was very traumatic for me, but I remember wanting to get back in the garden and enjoy the fruits of our labor. Gardening to me became synonymous with summer.
Unlike Laura, I moved into a house that was not even a blank slate. It was a rehab. A falling down fence, full of weeds, mud, and critters. While it has been hard and dirty work— we have renovated the space with new fencing, sod, garden beds, plants, and a poured patio. I still despise the chain link fence— but working in the garden and testing different plants has brought me so much joy, and has allowed me to really learn the meaning of hard work. Crazy enough— I do love being covered in dirt, too!
Last winter (starting in December 2019) I felt a big void of not having green things to do. To compensate, I started building my houseplant collection (now up to 80+!) and have gotten into seed sowing with a full operation in our basement. I crave year round greenery and am so thankful to have found outlets beyond summer.
What is your favorite type of perennial in your garden?
Laura: Ahhh! I am a true perennial lover! This is such a tough question! I have so many plants that I truly love and appreciate. When adding to my garden spaces, I try to include a variety of bloom times so that I have constant blooms throughout the season. I love watching new flowers flourish as the we move from spring through summer and into fall. My very favorite spring perennial is probably the purple Snake’s Head Fritillary that I inherited with my house. When it blooms, it is a sure sign that summer is coming!
Emily: Perennials began my love of gardening. When we were redoing our yard, I wanted all the flowers without spending all the money. The great thing about perennials is that not only do they come back every year, but established ones need to be divided. I started my backyard with plants from Laura’s garden and my parents. Any hosta, coneflower, phlox… anything. Those are my staples, but I am a lover of English gardens and the style of having beautiful flowers encased with a formal hedge. That is how I was inspired to plant countless delphiniums. They’re my number one favorite. Temperamental, but gorgeous.
What is your favorite houseplant at the moment?
Laura: With encouragement from my brother and Emily, my houseplant collection is expanding now that I can keep my animals and pets away from them. My brother recently gifted me aSwiss Cheese plant (Monstera adansonii)that he propagated in water. I love the leaf texture. I also just bought two algaonemas (a tigress and a cutlass) who my kids have fondly named Brenda and Louisa.
Emily: These questions are so hard. As you can see— I love all things green. Anything. I love philodendrons. They’re my number one and I have a growing collection. Proud to say that I just added one of my wish list plants– a silver sword (hastatum). It was splurge, but I am so excited to see it grow (then I’ll give a cutting to Laura)!
While philos are my favorite, they can be slow growing. That’s why I also love tradescantia. So fast growing, so many varieties and the easiest to propagate! Highly recommend them too as a beginner plant and putting outside in the summer!
What advice do you have for people who want to get into gardening?
Laura: I always think of gardening as free therapy. Being able to put your hands into the dirt, pull out weeds, and make things look pretty is so calming and is a huge stress relief. I would encourage people to start small and see how they like it. Most plants are fairly inexpensive and do not take a whole lot of extra care once you get them into the ground. If you do not know where to start, we are happy to help!
What is your favorite edible plant to grow?
Emily: I love tomatoes, but haven’t had the best crop over the last few years. There is nothing better than fresh tomatoes from your garden to snack on, in a salad… anything. With my tomato challenges– I would say green beans are my favorite now. So satisfying to direct sow them and see them sprout from the ground. I also have some new fun varieties this year to try (like dragon tongue beans from Johnny’s).
Laura: Zucchini. It is a beast of a plant, but it’s really so easy to grow! I also love the challenge of finding 1,001 things to do with it!
My kids LOVED our bean plants last year, so I am also planning on planting a whole bunch of different varieties of those. I am not nearly as organized as Emily, so I could not tell you what seeds I have already purchased (or when I need to start them). Making a spreadsheet to plan my seeds is on my to-do list. I will share it with you soon!
What is your favorite type of annual to grow?
Emily: Annuals are instant gratification. They add so much color and joy that it is SO touch to choose. I have really gotten into annual pot arrangements and sprinkling some ingrown plantings when my perennials are in a lull. If I had to name three– dragon wing begonias for pops of color in the ground (they get huge!), snapdragons, and marigolds.
Last year Laura and I started growing our annuals from seed and snapdragons and marigolds were the stars. Great for cut flowers to bring in the house and marigolds are so beneficial to our veggie gardens.
Laura: I loved the salmon zinnia (Floret Flowers) seeds that Emily gifted me last summer. They were a beautiful color and provided constant blooms for a good 5-6 weeks. Last summer, I direct sewed a little late. I am going to try to do so sooner this year.
I had some gorgeous marigolds in my farm garden that were huge! I am hoping the seeds I harvested from the dead heads will produce again this upcoming summer.
What is your dream plant?
Laura: Indoor- I am a total sucker for variegated leaves. Any variety of variegated monstera would be welcomed with open arms into my home.
Outdoor: I love flowering trees and would love to add a couple cherry and peach trees to our farm garden.
Emily: Indoor- Pink princess philodendron. I know it is trendy, but I am a sucker for pink leaves.
Outdoor- Mitsuba Yama Japanese Maple. Found it last year, but didnt buy it and couldn’t find it after I started thinking about it all the time! We have a spot picked out for it and hoping to get it this year!
If you were only allowed to grow one type of plant for the rest of time, what would you pick and why?
Emily: This is such a depressing question. I love all plants. Do not make me choose ever. Next question 🙂
If you could picture yourself as a plant, what kind of plant do you think that you would be and why?
Laura: Sedum because it is low maintenance, very hardy, very reliable, and returns fuller, year after year. It also enjoys partial to full sun, just like me!
Emily: Oh my. I think I’d be a sunflower. They are so busy during the season— start off from seed, then turn into a giant plant. I am a bit busy with all my garden hobbies.